Custom code & sandboxing
Write your own HTML, CSS, and JavaScript — at one block, or for the whole page — safely.
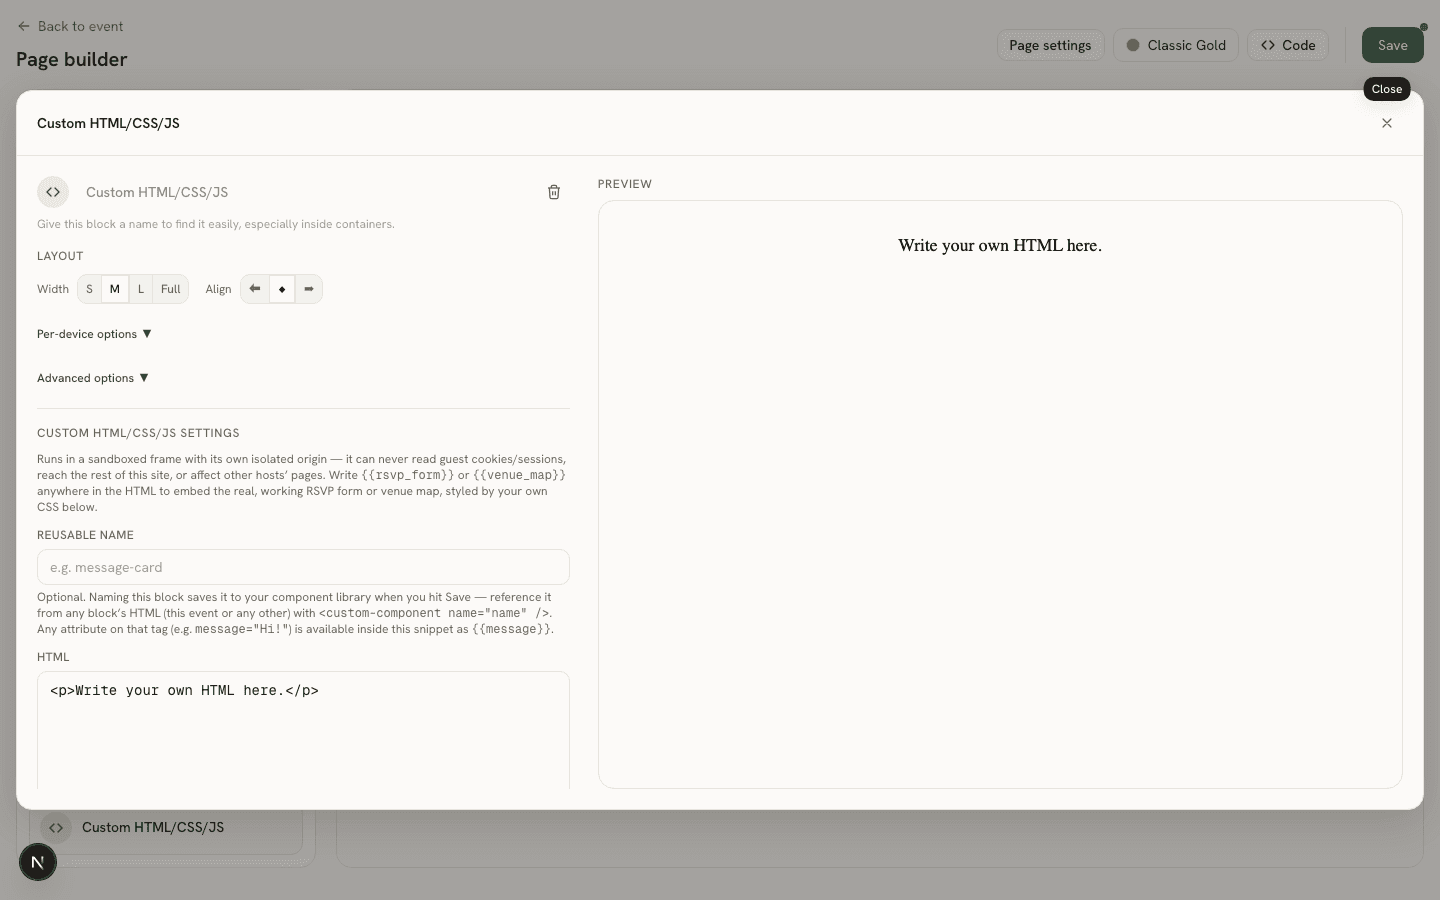
For anything the built-in blocks don’t cover, you can write your own HTML, CSS, and JavaScript directly. There are two ways to reach for it:
- A Custom HTML block, added like any other block, styled and scripted on its own, sized to a height you set.
- A whole custom page, turned on from Page settings ’ “Complete custom page” — replaces the entire block list with your own HTML/CSS/JS document. Your blocks aren’t deleted while this is on, just ignored; turn it back off and they’re still there.
Why it’s safe
Your code doesn’t run on the page itself — it runs inside its own isolated frame, sandboxed so it can execute JavaScript but has no access to anything outside its own box: no reading cookies, no reaching the rest of the site, no seeing any other data on the page around it. It’s the same isolation whether it’s one Custom HTML block or a whole custom page.
Good to know
Want the technical detail — the exact sandbox attribute, why it’s safe, how the CSP nonce threads through? See the sandboxing model in the reference section.
Embedding the real RSVP form or venue map
Write {{rsvp_form}} or {{venue_map}}anywhere in your HTML and it’s swapped out for the real, working RSVP form or venue map before your code runs — not a mockup. Style it however you like with your own CSS; the form still submits real RSVPs and the map still points at the actual venue.
Reusable components
Give a Custom HTML block a name in its “Reusable name” field, and saving the page adds it to your own component library — available from any block’s HTML, on any event you own, with a tag like <custom-component name="message-card" />. Any extra attribute you put on that tag (say, message="Hi!") becomes a {{message}}token inside the saved snippet’s own HTML/CSS — a quick way to build one card, banner, or widget once and drop it in wherever you need it, with different text each time.